maandag 10 december 2012

Campaign battle vs Grey Knights

I played my first battle in the first round of our narrative escalation campaign. It was a quick battle after some of the other players had finished their battle but others were still playing. My opponent's list consisted off a Grand Master with Nemesis Force Sword and Blind Grenades, an Ordo Malleus Inquisitor with Terminator Armour, Psycannon en 3 Servo skulls, 10 Strike Squad marines with 2 Psycannons, Psybolt ammunition and Justicar with nemesis force halberd, a Terminator Squad with Psycannon & Nemesis Force Halberd, 2 Nemesis Force Halberds, 1 Daemon Hammer and Justicar with nemesis force halberd and a Nemesis Dreadknight with Greatsword, Heavy Incinerator and Personal Teleporter. We rolled for mission and deployment and got Purge the Alien and Vanguard Strike. My opponent had 5 kill points in his list, I had six.

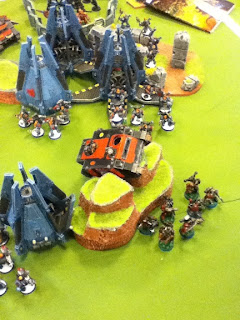
My opponent won the roll to go first and deployed first. I deployed the landraider behind some cover and the hellbrute behind it. The two missile launcher chosen squads went into reserve (kill point denial). I then seized the initiative.

In my first turn I moved the landraider forward 6" and shot at the dreadknight. I scored one or two wounds. The helbrute moved with the landraider, keeping behind it for cover.
In his first turn he moved his units a bit around. Most of his psycannons were out of reach of the landraider but he still managed to stun it, taking off it's first hull point. The dreadknight moved forward and tried to find some cover.

In my second turn both my squads of chosen arrived. Not what I had intended. They shot snapshots at the strike marines and killed at least one. The landraider also snapfired but didn't do much. I thought extra armour wasn't a good option any more but for a landraider it may still be worth its points.
In my opponent's second turn he jumped forward with the dreadnight towards the first squad of footslogging chosen. He shot them but I made my saves and then he assaulted them. I challenged with my champion, sacrificing him to save the other marines in the squad. The psycannons on his other squads stunned the landraider once more, taking off it's second hull point.

In my third turn I disembarked Abbadon and moved and ran him towards the dreadnight with the helbrute right behind him but they were still a long way ahead. I assaulted the dreadnight with the second chosen squad and sacrificed that champion as well in another challenge. Unfortunately one of the squads broke from combat and ran off the table, giving him first blood in addition to the kill point.
In his third turn he destroyed the landraider with his psycannons. The third chosen squad got out and got pinned. He also destroyed the second missile launcher squad in close combat and consolidated away from Abbadon.

In my fourth turn, Abbadon and the hellbrute moved closer. The hellbrute shot it's multimelta at the dreadnight but missed. Abbadon was too far away for the charge.
In my opponent's fourth turn, he used the dreadknight's teleporter to get next to my landraider, leaving Abbadon and the hellbrute away from any targets. With most of my stuff out of line of sight thanks to the terrain, he had no targets to shoot at.

In my fifth turn Abbadon and the helbrute came out in the open and ran towards his troops. The remaining chosen moved into the landraider's crater and shot their melta's at the dreadknight, killing it.
In my opponent's fifth turn he shot at Abbadon (who took a wound) and the helbrute (who made his cover save behind Abbadon). He also moved his forces back from my approaching models.

We got a turn six. In my sixth turn Abbadon and the helbrute moved closer. Abbadon made a charge towards the strike marines. He made the roll even though it was far and through terrain. He challenged (as he has) and killed the justicar.
In his turn, my opponent kept moving back with the terminators and his HQs. In combat, Abbadon destroyed several strike marines and they failed their morale check and ran away. Abbadon consolidated one or two inches. He also stunned the helbrute.

In my turn seven Abbadon moved through terrain and tried to assault the terminators but failed to make the assault.
In my opponent's turn, the strike marines regrouped. He then shot Abbadon down with the terminators. In the campaign we have to roll on a table to see if a special character suffers an aftereffect from being "killed" during a battle but he made it through without permanent injury and can fight again next battle.

In hindsight, I shouldn't have tried to go after the dreadknight. I should just have moved flat out towards his terminators. The landraider would normally have survived a round of shooting. I would then have been able to assault the terminators and his HQs with Abbadon and challenged my way through several kill points.

dinsdag 4 december 2012

NEC 1000 points army list

This friday we are starting a new campaing at our FLGS. This will be a narrative escalation campaign. I will be part of team "Disorder" consisting off Chaos Space Marines, Dark Eldar, Necrons, Tau and Tyranids. Team "Order" will consist of Space Marines, Grey Knights, Dark Angels, Space Wolves, Black Templars, Imperial Guard and Orks. We are starting with 1000 points and with 250 point increments each month will work up to 1750 points.

I will be playing my Dark Wolves as Chaos Space Marines using the new codex. My 1000 point list will containt the following:

HQ - Skyrar (counts as Abbadon)

TROOPS - 5 Chosen with mark of slaanesh, veterans of the long war and 3 meltaguns

TROOPS - 5 Chosen with mark of nurgle, veterans of the long war and a missile launcher

TROOPS - 5 Chosen with mark of nurgle, veterans of the long war and a missile launcher

ELITES - Helbrute

HEAVY SUPPORT - Chaos Landraider with dirge caster

Hobby progress update ...

I have made some progress on my landraider. This is the first one I ever assembled. Just to make sure, I magnetised as much as possible, starting with the hatches and sponsons.


I also added the greenstuff dark wolves icons.


I bought some kromlech landraider dozer blades. This is a decent kit. I also magnetised them which was a bit tricky.


Since some of the tracks have imperial symbols on them, I made a mould of one of the normal tracks and cast them with green stuff


After that I assembled the kit. The dirge caster is also magnetised and can be attached at three locations. But I glued the model together before taking a pic of the magnets on the inside.


I also converted the dark vengeance helbrute. I made a mould of the face bit, cast it in green stuff, cut it up and inserted a wolfen head. I also trimmed down both undersides of the breast plate to give it a more dreadnought look. A bit of green stuff was required to fix up the area.


For my Abbadon version of Skyrar, I bought a finecast abbadon and used his weapon arms to convert regular chaos terminator arms.


Tournament battle vs Dark Eldar

My final battle at the Warpstorm tournament saw me facing off against a Dark Eldar opponent. His army consisted of an archon three units of warriors in raiders, two units of trueborn in venoms, a unit of trueborn in a raider and three flyers. In this mission we needed to hold objectives turn by turn (checked at the start of the turn) as the primary objective. Non-flyer and non-vehicle fast attack choices were also scoring but neither of us had any. Kill points (scoring units only) were secondary. First blood, linebreaker and Slay the Warlord were also in effect. Deployment was Spearhead. I got the warlord trait that gave me feel no pain while within 3" of an objective. I don't remember what my opponent had. I didn't switch my space wolf psychic powers.

My opponent won the roll to go first. He deployed his forces forward. I deployed both units of longfangs, taking the gamble that I could use the firepower if I seized the initiative. But I didn't seized the initiative.

In my opponent's first turn he moved towards the objectives. He then shot all his stuff at the long fangs, destroying one squad (giving him first blood) and then almost wiping out the second squad.
In my first turn I dropped down next to his vehicles near the objectives. The multi-melta's couldn't get through his AV10 vehicles and when they did, he made his cover saves. I did blew up one raider with my terminators and the occupants moved into nearby terrain. Two units of grey hunters blew up and destroyed the occupants of another raider. I now had two scoring units on objectives.


In his second turn, my opponent started blasting away with his incredible amounts of shooting power. Two of his flyers also arrived and their combined shooting killed all but three of the grey hunters. Luckily they were still in range of the objective. He blew away Logan and the multi-melta longfanfs in one turn, even with feel no pain. In addition, only the runepriest and two terminator survived from that squad. And he was now contesting that objective.
At the start of my second turn I took 1 victory point. I assaulted the small squad with the runepriest and the terminators and destroyed them. Two of his three scoring units were now gone. My last unit of grey hunters arrived and dropped down on the middle objective. More meltaguns shot at the raider holding his last scoring unit but again without destroying it. The remains of both grey hunters squad on his table edge moved next to the objective.


In his third turn his last flyer arrived. He shot everything he has left and took out the last terminators and the runepriest, both remains of the grey hunters squad and all but two grey hunters from the new squad.
In my third turn I regrouped the remaining grey hunters and moved them back onto the objective. More shots went into the raider, basically from everything I had left being the two grey hunters and the drop pods, but I couldn't destroy it as he kept making saves whenever I scored a glancing hit.


In his fourth turn he got his last troops out of their ride, moved up towards my grey hunters and shot them down. He then moved onto the objective.
In my turn I focused the shooting from the drop pods on his unit but as he went to ground in area ruins terrain for a 2+ cover, a trick he had picked up from me, I couldn't wound them.


In his fifth and sixth turn he picked up two more victory points for the primary mission. I got the moral victory when I shot down the damned raider that wouldn't die with some drop pods. He had linebreaker, first blood and slay the warlord. He had also killed more scoring units than me, giving him the secondary objective as well. So he won 11-5.

maandag 3 december 2012

Tournament battle vs Chaos Space Marines

My second battle at the Warpstorm tournament saw me facing off against another old opponent, from the blog Death from Above. He brought his chaos space marine army. His army consisted of typhus, a large unit of zombie cultists, two units of plague marines in rhinos, a unit of terminators in a landraider, two lascannon/autocannon predators, two obliterators and an aegis defence line with a quadgun. In this mission we had table quarters as the primary objective (although only troops could claim/contest them). Kill points were secondary. First blood, linebreaker and Slay the Warlord were also in effect. Deployment was Dawn of War. Our warlord traits didn't come in effect. I didn't switch my space wolf psychic powers.

My opponent won the roll to go first. He deployed his forces across his board edge. The obliterators manned the quadgun and the zombies were hiding behind the defense line. I deployed once more a single wolfguard terminator, hidden completely from sight behind terrain. I didn't seized the initiative.


My opponent moved some of his forces forward but had no shots against the lone wolfguard. He didn't use smoke which was to my advantage.
In my first turn, I dropped Logan and the multi-melta longfangs next to his landraider. The terminators and the rune priest dropped in the center, hiding from the predators behind their drop pod. Both units of missile launcher longfangs dropped down as well. I was hoping to snapshot the nearby rhino so the plague marines had to come out and then the combi-plasmas from the terminators could take care of them. But I failed to destroy the rhino. The multi-melta's did blew up the landraider, taking a terminator with it in the explosion. The wolf guard terminators took some shots at the disembarked chaos terminators and dealt a wound to Typhus.


In my opponent's second turn, Typhus and the terminators shot up and assaulted Logan and the longfangs. The rhino that had escaped my other longfangs moved forward towards the lone wolfguard, but got stuck in terrain. The plague marines disembarked further away from my units and towards the lone wolfguard. He shot up the wolf guard terminators, killing the runepriest and at least one more terminator. Logan and Typhys killed each other in combat. A single longfang remained locked in combat with his remaining terminators.
In my second turn the wolf guard terminators moved up towards his predators and assaulted one, knocking off a hull point and a weapon but not destroying it. One of the remaining longfangs units moved into better position and snap fired at his other predator. The other longfang unit shot some blasts at the plague marines. The lone wolfguard moved even further into terrain seeking cover from the approaching plague marines. Two of my units of grey hunters arrived: one near the defense line and the other near the plague marine's rhino as they scattered to far away from the plague marines. The first unit took some shots at the zombies, killing a few. The other squad took out the rhino.


In my opponent's third turn, he moved his terminators up towards my terminators but failed to reach them in the assault. The plague marines disembarked from the other rhino. The obliterators shot up the nearby grey hunters and killed a few of them. His other plague marines moved forward and killed the lone wolf guard. The wolf guard terminators that were still in base contact with the predator, knocked off the last hull point(s) and wrecked it.
In my third turn, I moved up the grey hunters towards his plague marines and took some shots at them. One unit of longfangs with missile launchers also started to take shots at them with AP3 missiles, killing a few. The other squad of grey hunters moved through terrain and assaulted the zombie cultists, killing a lot of them. The zombies were too spread out and after taking casualties, couldn't even strike back as their pile-in move didn't bring the remaining zombies in combat. The wolf guard terminators moved towards the chaos terminators and assaulted them. My last grey hunter squad also arrived this turn and I dropped it in the remaining table quarter.


My opponent tried to keep his plague marines out of harms way. Blocking one squad with a rhino and moving the other squad as far away from my units as possible. He threw both obliterators into the combat with the zombies, killing a few grey hunters but leaving the mark of the wulfen alive. I had spread out my attacks between both targets but the zombies survived. The wolf guard terminators killed his remaining terminators and consolidated into terrain in that table quarter.
In my turn (and we were running out of time so we agreed this would be the last round) I moved one unit of grey hunters in the table quarter that held his fleeing plague marines, contesting that quarter. I kept the wolf guard terminators in cover, contesting that table quarter from the other plague marines. I held one with my third unit of grey hunters. In combat I focused all my attacks on the zombies, killing them all. He kill didn't kill all the grey hunters with his obliterators so I still held that quarter.


In the end I held two of the four quarters and he held none. I got one more kill point than him. We both had linebreaker and slay the warlord but I also had first blood. Finaly tally: 15-2 for me.