dinsdag 9 oktober 2012

Tournament battle vs Tau

My second battle at the Challenge 7 tournament saw me facing off against a Tau player. My opponent brought a battlesuit HQ with bodyguards and shield drones, another squad of battlesuits with shield drones, two units of firewarriors, a unit of kroot, two piranhas, a small unit of steath suits and two hammerheads. He brought a lot of AP2 firepower to the table. In this mission we had 5 tablequarters (each worth 3 mission points) as the primary objective. You can score additional points if you got more victory points off your opponent (3 points per 300 points of difference). The deployment was 5th edition spearhead with the central nomansland as 5th table quarter. Our warlord traits didn't come into effect. I kept my space wolf psychic powers as he had several low initiative value models.

I won the roll to go first and deployed both units of missile launcher longfangs in area terrain. He castled up in his corner, deploying all of his units. The stealth suits infiltrated into the quarter next to my deployment zone. The kroot infiltrated into the other table quarter. He then seized the initiative.


In my opponent's first turn he moved his vehicles so they could benefit from an enhanced cover save. One of the piranhas moved towards the centre behind cover. The stealth suit jumped forward, shot at the missile launchers with a meltagun and jumped back behind cover. But my longfangs weathered all his shooting well, going to ground with one unit for the extra +2 save.
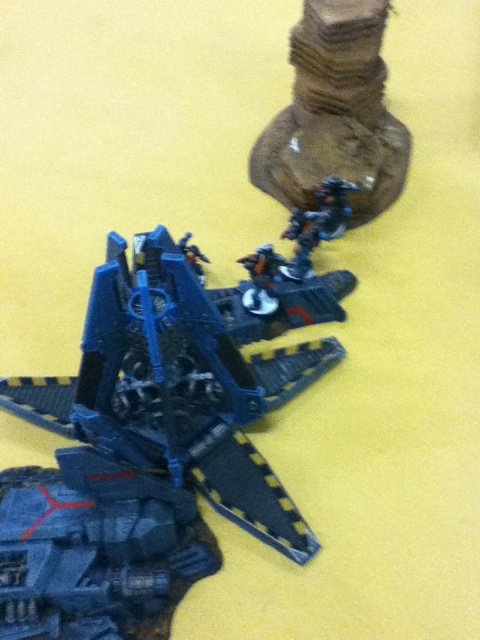
In my first turn, I dropped down Logan and the multi-melta longfangs right between his units. They scattered but couldn't get far because of his units. The multi-melta's split fire on his vehicles and suits but did nothing. I also dropped down both plasma grey hunter squads which both unleashed their shots at the firewarriors who were in front. One of those, the one nearest to his deployment zone, fell back off the table. The other one held it's ground.


In my opponent's second turn, he moved some of his vehicles to clear some space. He shot half of his army at Logan and the longfangs, failing to kill them all but causing one wound on Logan. the rest of his army shot at both grey hunter squads. The stealth suits did their jump shoot jump again.
In my second turn, the melta grey hunters and the runepriest arrived next to his suits. An empty drop pod also arrived and I put that one between the long fangs and the stealth suits. Logan left the remaining longfangs and moved towards the HQ. The runepriest got off Jaws of the World Wolf, taking down a HQ bodyguard, a shield drone and another suit. The rest of the grey hunter unit killed one of the drones. One of the plasma grey hunters squads turned around, shot and assaulted the kroot, winning combat but due to the terminator wolf guard could not try to catch them so they ran away. The remaining long fang shot and assaulted the firewarriors but was shot down in overwatch. Logan assaulted the HQ unit, lost a second wound due to overwatch and then his final wound in close combat before he could strike. If he should have lived, he would propably have taken care of that unit. The remains of the other plasma grey hunter squad assaulted his hammerhead but suffered lots of casualties due to a defensive upgrade. I did take one hull point off it with grenades and rending attacks from the mark of the wulfen.


In my opponent's third turn, his kroot continued to fall back towards their table edge. He moved his hammerhead away from my unit. More shooting came my way but was not as devastating as before.
In my turn, another empty drop pod arrived in the centre of the board. I took some shots with the missile launcher longfangs and managed to kill the melta stealth suit. The remains of the grey hunters that had defeated the kroot turned once more around and headed for the fire warriors. In stead of assaulting them (and suffering overwatch fire), I opted to just unload with bolters. A few drop pods helped to finish them off to the last fishman. The runepriest left the unit of melta grey hunters and moved into position for another Jaws attack. The rest of the unit moved up so they could assault the HQ unit. The few remaining grey hunters in the other squad moved up towards the hammerhead, and into that table quarter. They shot and assaulted the vehicle. Again I suffered casualties, leaving only the mark of the wulfen who failed to hurt the hammerhead. The melta grey hunters made it into combat and took down at least one model but he held his ground. The runepriest got off the Jaws, taking down a shield drone and the second bodyguard. He then assaulted the remaining suit in front of him but was shot down in overwatch, suffering an instant death wound that he didn't save.

In my opponent's fourth turn, he started to move his units around, calculating victory points as we were running out of time and this would be the last round. His remaining stealth suits made it into the centre of the board to claim that quarter. He shot down the lone mark of the wulfen. His HQ survived another round of close combat. At the end of his round, he had three out of five quarters claimed (one with the piranhas, one with stealt suits and one with the hammerhead), I had one (with the longfangs) and we were still tied in the last one as we both had most of our surviving units in that one.
My fourth turn was the most exciting turn in a tournament so far as everything I still had left had to do well to tie, let alone win the game. I first tried to move the largest squad of longfangs around the drop pod and with a good run into the middle of the board. I rolled horribly on my difficult terrain roll so that was out. I then moved the other longfang squad out of terrain and into the center and took a snapshot at the stealth suit but failed. I then used the drop pod to shoot at the stealth suits and shot one down. His stealth unit was now under half strenght, meaning half victory points and with my longfangs and the drop pod, I now had the centre table quarter. As we were now tied, everything depended on the last quarter. I couldn't hurt the hammerhead with my grey hunters so I moved them closer, making sure they were in the quarter. The drop pods then took aim at the last suit that was not engaged, taking off another wound but failing to kill it. In the final round of combat, my melta grey hunters took down his HQ.


We calculated victory points left in the last quarter and at the end I held it, just barely. We calculated total victorypoints as we could still draw if he had more than 300 victory points left over than me. But he didn't (280 or something), giving me a second win for the day.


Tournament battle vs Grey Knights

My first battle at the Challenge 7 tournament saw me facing off against a young grey knight player. My opponent brought crowe, 3 units of purifiers (two in rhinos and one in a stormraven), a dreadknight and two psyflemen dreads. In the first mission there are 5 objectives (each worth 3 mission points) as the primary objective. You can score 5 additional points if you get slay the warlord (3 points if you lose your own warlord afterwards). The deployment was Dawn of War. Mysterious objectives were in effect. I got the warlord trait that I could get more mission points if I kill a character in a challenge. My opponent's warlord trait didn't come into effect. I kept my space wolf psychic powers.

We placed objectives mainly in the middle of the board but I also got one in area terrain on my side of the board. I won the roll to deploy first. I deployed both units of long fangs with missile launchers in area terrain, one on each side of the board. I also deployed a plasma grey hunter squad in the same area terrain of the long fangs, on the objective I had placed there. He kept his dreadnight (who was going to deepstrike in) and his stormraven (being a flyer) with a unit of purifiers embarked in reserve. He split his army and had one psyfleman dread and a rhino with purifiers on each side. He was unaware that Crowe is not an independant character and thus could not join a unit in their dedicated transport. So he deployed him between a dread and a rhino on one side of the board. He failed to seize the initiative.


In my first turn I dropped down Logan and the multi-melta longfangs, the melta grey hunters with the runepriest and the second squad of plasma grey hunters around his units with Crowe. I opened fire on Crowe (but failed to hurt him), the dreadnought, the rhino and even the occupants when the rhino was wrecked. He lost the dreadnought, the rhino and a few purifiers. Only two of my missile launcher longfangs had range and line of sight on his other rhino but failed to hurt it.
In his turn, he moved his other rhino up and popped smoke. His other dread moved up and shot at Logan and the longfangs. The purifiers shot at the melta grey hunters and assaulted them. He lost at least one to overwacht fire and I then slaughtered the rest in assault. Crowe assaulted the longfangs and Logan. Logan and Crowe got in a challenge and I promptly slew him, giving me the secondary mission objective. The only downside was that I now had to footslog towards the middle of the board and the primary objective markers.


In my second turn two empty drop pods arrived and I dropped them between Logan with the longfangs and his other dread, giving me cover. I moved and ran up towards the middle of the table. The missile launcher longfangs that had range shot at the rhino and got it shaken or stunned.
In my opponent's second turn, he didn't get any of his reserves in. He got rid of the shaken result on the rhino with his psychic power and moved up and into the terrain I was holding with the longfangs and the grey hunters.


In my third turn, I continued to move up towards the middle, taking a few shots at his second dread with the multi-melta longfangs. The missile launcher longfangs wrecked the rhino and he got out behind it and out of sight of my grey hunters who had moved up to shoot them.
In his turn, he kept moving the dread into spots where he could fire at my units. Both the dreadknight and the stormraven arrived. The dreadknight deep struck in front of the terrain my units were holding and flamed them. The stormraven shot at my units but didn't do that much damage. The strike squad moved up and assaulted the longfangs with only the sergeant surviving. In retrospect, I don't think he could have assaulted as you cannot assault in your subsequent assault phase after disembarking (even from a wrecked damage result). Which would have given me a full turn of firing at them and even launching an assault myself.


In my fourth turn, Logan and the longfangs moved up towards the dreadknight. My last drop pod arrived and I dropped it between the dreadknight and my grey hunters in the area terrain. My grey hunters kept moving towards the objectives in the middle. The other missile launcher longfangs finally had a target and shot at the dreadknight, taking off one wound. Logan and the multi-melta's then took off the last three wounds as he failed all his invulnerable saves. The purifiers destroyed the longfang sergeant.
In his fourth turn, he pivoted the stormraven 90 degrees and came towards the middle. He shot at Logan and the longfangs and the nearby grey hunters, killing a few longfangs. The purifiers assaulted the grey hunters in the area terrain.


In my fifth turn, I moved up towards the objectives. Logan and the remaining longfangs moved up and ran, hoping to get near the purifiers. I snapfired at the stormraven without any result. The purifiers destroyed the last of the grey hunters and consolidated out of sight but within scoring range of the objective.
In my opponent's fifth turn, the stormraven went in hover mode, disembarked the purifiers and then moved back so it didn't block line of sight to my units. The purifiers unleashed their shots on my grey hunters. They tried to assault, even declaring a disorderly charge on Logan's squad as a secondary target. He failed to reach me and the overwatch didn't do that much. But his shooting has succeeded in taking me off a second objective so we both held one objective.


We rolled to see if there was going to be a turn 6 but the game ended. We drew on primary objective but I won the game thanks to the secondary objective.


maandag 8 oktober 2012

Hobby progress update ...

I finished texturing the new display board. I used a mix of small gravel (used for railroad scenics) and watered down pva glue. It seems the paste dries really hard so it should stand up to a bit of abuse from travel.

Tournament test battle vs Dark Eldar

More than a week ago I played another 6th edition game. I once more used the list that I plan on taking to the Challenge 7 tournament. My opponent brought a dark eldar "bane of my existance" list consisting off the baron, a homunculus, a large unit of helions, a small unit of wracks, two units of wyches in raiders, two units of trueborn with blasters in venoms and two ravagers. We played the first mission of the challenge 7 missions. In this mission there are 5 objectives (each worth 3 mission points) as the primary objective. You can score 5 additional points if you get slay the warlord (3 points if you lose your own warlord afterwards). The deployment was Dawn of War. Mysterious objectives were in effect but we forgot about them (6th is still new to us).

We placed objectives mainly on my opponent's board edge and near the middle of the table. My opponent won the roll to deploy first. He deployed all of his units with the ravagers, the wracks with the baron in the middle, the venoms and the raiders behind a building on his right and the helions with the homunculi on his left. I almost deployed the long fangs with missile launchers but decided not to in the end. I got a worthless warlord trait that lets my warlord and his unit outflank. My opponent got the one that allows him to reroll run dice. My opponent got +1 WS for this combat drugs.

My opponent had first turn and I then decided to seize the initiative, which was a big mistake I think as I did seize. The better option would have been to either not seize or to actually deploy the long fangs and maybe even a grey hunter squad.

On my first turn I dropped down the melta grey hunters with the runepriest next to his venoms. I dropped a squad of long fang missile launchers but they scattered back. I also dropped down Logan and the multi-melta longfangs. With all my shooting I succeeded in removing one hull point from a raider and one hull point from a venom. Epic fail! The snapshotting missile launchers took down the homunculi who was the first model in the unit of helions.
In my opponent's first turn he let the baron join the helions, taking the wrack's pain token along. He then moved one raider forward towards my longfangs. The witches got out and assaulted the longfangs. His other shooty units got in line of sight of my longfangs and Logan. The helions blew away Logan who failed his third and fourth armour save and then continued to roll ones on his look out sir but making the saves. Then the rest of his army shot at the longfangs from the other side, taking them and Logan down without needing an assault. His other wytches got out of their raider and assaulted the runepriest and the grey hunters. I had already lost several grey hunters and the wolf guard to shooting.


On my second turn both the grey hunter squads dropped down in front of his helions. I unloaded with both units and only killed three helions. He made an exceptional number of cover saves (improved by the baron) and feel no pain whenever he failed a cover save. My second squad of missile launcher longfangs dropped down in terrain and shot down a venom. Combat between the wyches and the grey hunters with the runepriest continued.
In my opponent's second turn, the helions turned towards one of the grey hunter squads and between shooting and assault, wiped them out. I even killed my own plasmagunner who overheated in overwatch. He shot the rest of his army at the second grey hunter squad and the missile launcher longfangs. Only one grey hunter remained. Both squads failed their morale checks and ran towards their board edge.


On my third turn my fleeing units regrouped automatically. The lone grey hunter moved up and assaulted the wracks, shooting one down with his pistol but failing to kill the other one in assault. Whatever I still had left that could shoot, mainly drop pod stormbolters, shot at his vehicles, taking at least one down. The runepriest and the wyches were still in combat. I kept making my 2+ armour saves while I couldn't hit a dark eldar if my life depended on it.
In his turn, the hellions and the baron assaulted the lone grey hunter locked in combat with the wracks and killed him. He also started to take down the drop pods and the remaining long fangs.


On my fourth turn, I had almost nothing left, let alone something that could move or shoot. So my turn went by really fast.
In my opponent's turn, the baron and the hellions made it to the combat with the rune priest and that was the end of it. I had only one or two drop pods left so we called it.


Dark Eldar is still a bad match up for my army. They can pack sooo much firepower and my force is still to elite for that. The baron and the helions got even better this edition, especially if you can get them into cover. Yes, they have to take dangerous terrain tests but the baron lets them reroll those and then they still have an armour save and a feel no pain roll so the chances to lose a model are very slim.


donderdag 4 oktober 2012

Hobby progress update ...

I took a day off from work today to make sure I finished the drop pod for my 1500 points list I will be using at the Challenge tournament saturday.


And here is the finished 1500 points army I will take to the tournament ...


Since I finished earlier than anticipated, I also got some work in for another project that I need to finish within the next week ...


maandag 1 oktober 2012

Hobby progress update ...

Last weekend, I finished the four marines.


The long fang sergeant


A grey hunter with chainsword


A grey hunter with chainaxe


And a grey hunter with chainaxe and wolf standard